How to Roll a Perfect Joint: Step-by-Step Guide for Beginners
Rolling a joint is a classic skill in cannabis culture, and once you learn it, it becomes second nature. Whether you’re new to cannabis or simply want to improve your technique, rolling a smooth, even, and slow-burning joint doesn’t have to be complicated. This beginner-friendly guide walks you through each step clearly and simply so you can roll with confidence.
What You’ll Need
Before rolling, make sure you have the essentials:
- Rolling papers
- Cannabis (properly ground)
- Filter or crutch (optional but recommended)
- Grinder
- Flat rolling surface
Using the right materials plays a big role in how your final joint turns out.
Step 1: Grind Your Cannabis
Start by grinding your cannabis into a medium-fine consistency. This ensures a smooth burn and makes rolling easier. Avoid grinding it too fine because it can restrict airflow, and don’t leave it too chunky because it can create uneven pockets in the joint.
If you don’t have a grinder, use clean scissors or gently break it up by hand.
Step 2: Prepare the Filter (Crutch)
A filter makes your joint easier to hold and prevents loose cannabis from entering your mouth. You can use a pre-made tip or make one from thin cardboard.
Fold the end of the cardboard into a small “M” or “W” shape, then roll the rest of the paper around it. The size of your filter depends on your joint thickness, but a 1 cm width usually works well for beginners.
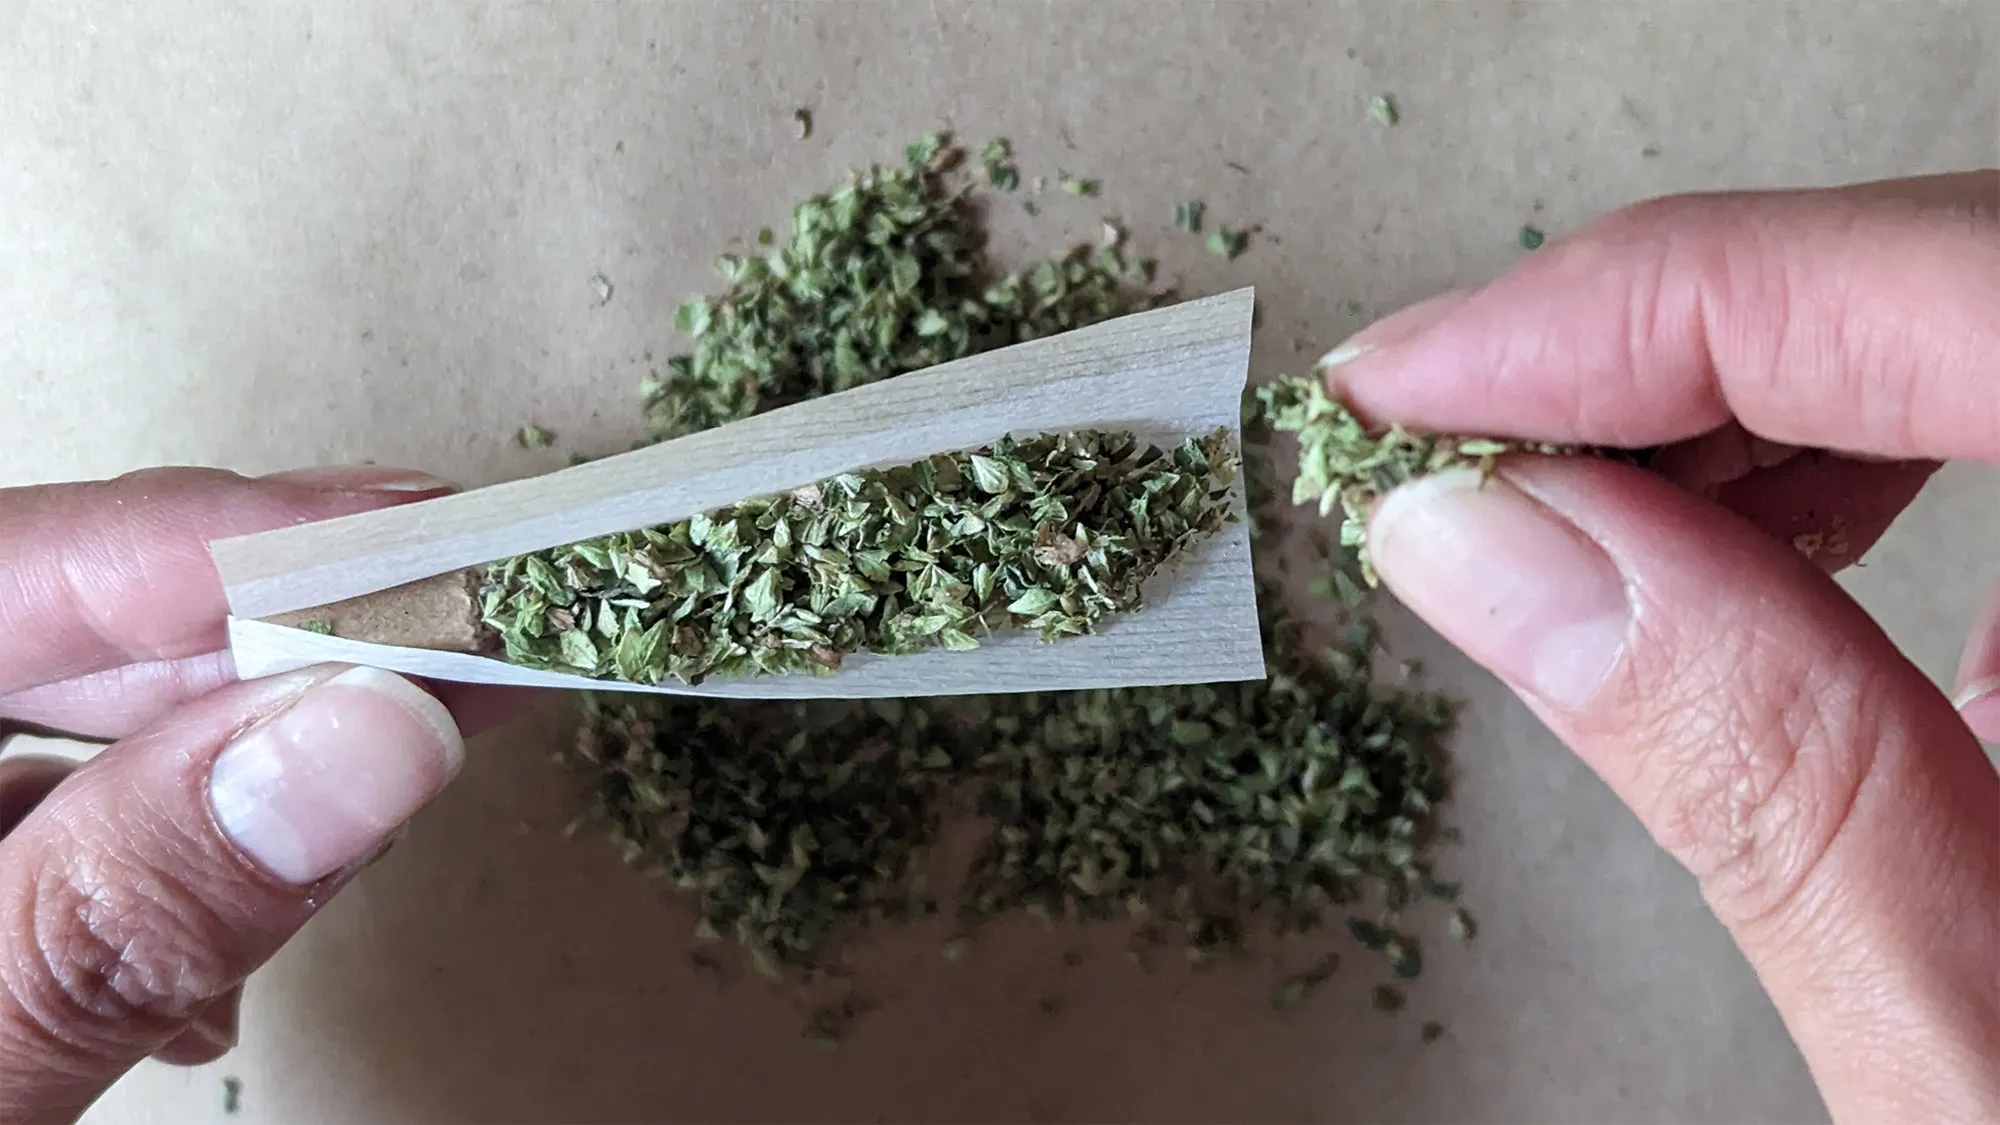
Step 3: Fill the Rolling Paper
Hold your rolling paper with the glue strip facing up and away from you. Place the filter at one end. Now, sprinkle your ground cannabis evenly along the paper. Beginners often make the mistake of overfilling. Start small — about 0.3g to 0.5g is perfect for a practice joint.
Spread the cannabis evenly. Even distribution is the secret to a smooth and consistent burn.
Step 4: Shape and Roll the Joint
Pinch the paper between your fingertips and gently shape the cannabis into a cylinder. Begin slowly rolling the paper back and forth to pack the cannabis lightly.
Once the shape feels consistent, tuck the unglued side of the paper under the cannabis. Use your thumbs to guide the tuck. This step takes practice, so don’t worry if it doesn’t look perfect right away.
Step 5: Seal the Joint
After tucking, lick the glue strip lightly and seal the joint from the filter end to the tip. Always seal in one smooth motion to avoid wrinkles and air pockets. A tight but not overly compressed seal is the goal.
Step 6: Pack the Tip
To prevent the joint from burning unevenly, give the open end a gentle tap on the table or use a pen tip to pack it slightly. If needed, twist the tip to close it.
A properly packed joint burns smoothly and stays lit longer.
Step 7: Light It Correctly
Hold the joint horizontally and rotate it while lighting the tip. This helps create an even cherry. Take slow draws rather than big, fast puffs. Beginners often burn joints too quickly by inhaling too hard, so take your time and enjoy the moment.
Beginner Tips for a Better Roll
- Use thinner papers for smoother burns.
- Practice with less cannabis until you get the technique right.
- Keep your hands dry for better grip.
- Don’t overpack — airflow matters.
- Try pre-rolled cones if rolling feels difficult at first.
Final Thoughts
Rolling a perfect joint is a skill that comes with practice. Start with small amounts, focus on even shaping, and use a filter to keep things simple. With the right technique and a bit of patience, you’ll be rolling smooth, slow-burning joints in no time — and enjoying a more consistent and enjoyable cannabis experience.